More Than a Bow On Top | Clever and Creative Gift Wrap

The best gifts are often the ones you’d like to keep for yourself. Help your gift receiver to enjoy the moment as much as the gift. From unique paper to embellishments, your personalized gift presentation will help the recipients to slow down, not rush past the moment and savor the sight of what has been laid before them.
Let’s explore the wide range of creative ideas available when wrapping a gift.
Unconventional choices for wrapping paper
When we think of preparing a gift, we instantly think of wrapping paper. But we aren’t limited to the typical holiday or birthday paper with snowmen or candles on it anymore. Consider using a more personalized selection based on who will be on the receiving end of your gift.
Fans of all things classic will delight in a gift presented in vintage newspapers. Try to find one close to their birth year, or a special period in their lives. Similarly, a gift wrapped in old, handwritten letters will add a historical feel to the presentation. Maps, sheet music, leftover wallpaper, or a printed word search are unique and whimsical ways to wrap a gift.
Layering is another way to elevate the look of your gift. Start with a simple paper, such as plain white or brown craft paper and add any one of the options above. Or choose two patterned papers with contrasting designs but similar colors, and wrap each half of the present. Complete the look with a coordinating colored ribbon separating the two sides. Plain black paper with white paint pen lettering or drawings mimics a chalkboard, and is an ideal presentation for teacher gifts.
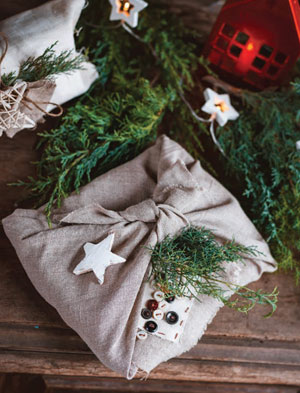 Other substitutions for traditional wrapping paper include a handkerchief, a scarf, or burlap fabric. Baby gifts can be bundled up in cozy custom baby blankets and tied with a beautiful satin ribbon. Use a tea towel or two to wrap a kitchen-themed gift for a wedding shower or housewarming party, and your favorite fabrics can easily be made into no-sew gift bags. Simply cut two pieces of fabric into the same size using pinking scissors. This will create a fun zig-zag edge that won’t fray. Attach double-sided tape to the inside of one of the swatches of fabric on all three sides. Firmly press the other piece of fabric on top, insert your gift and tie up the top. Voila — a gorgeous way to present your gift!
Distinctive decorations
Now that you have created the base of your wrapping, it’s time to think outside the gift box. Embellishments will take your gifts from wonderful to wow!
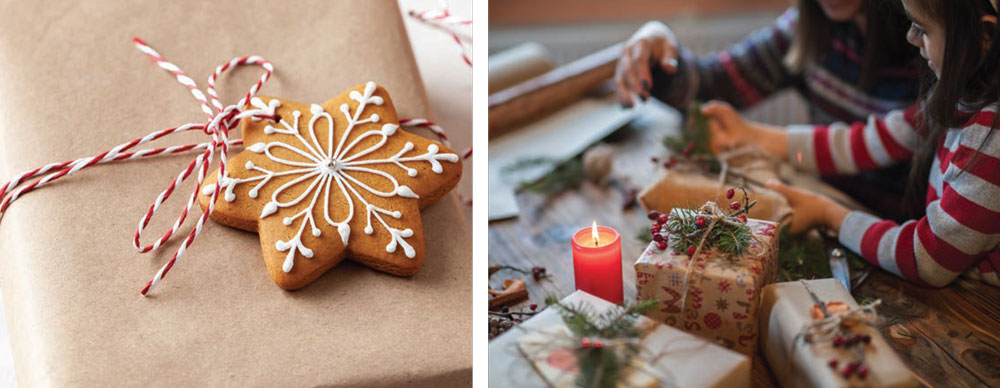
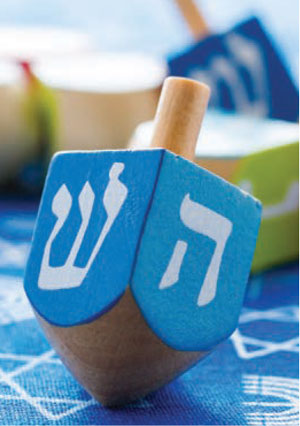 You may have seen candy canes, ornaments, pine cones and greenery adorning presents for the holidays, but have you ever considered wrapping your holiday presents in battery-powered lights? Or creating a winter or holiday scene on the top of your present with small trinkets and figurines? To accomplish this look, spray your wrapped present with a light layer of faux snow and allow it to dry for three to four hours. Then create the scene by attaching Christmas trees, carolers, snowmen, street lamps, Santa and his reindeer, or even characters from your favorite holiday movies. For Hanukkah, use gold or silver spray paint and add a menorah, a dreidel, or the Star of David. This idea is not limited to winter holidays. Toy cars, action figures, animals, doll house furniture, and tiny fairies can create a delightful scene for children’s gifts.
Other attractive items to adorn your presents include feathers, buttons, pompoms, tassels, beads, pearls or jewels. Use alphabet letters to write a message on the outside of your gift such as “No peeking,” “Surprises inside” or “Prepared with love.”
 Stamps and stencils offer another way to jazz up simple wrapping paper. If you used old maps, letters and newspapers as wrapping paper, add twine and a wax seal to complete the vintage look. For a fancy and feminine presentation, add lace or doilies on top of solid colored paper. Flowers and greenery are another way to add interest. A tiny bouquet of dried flowers wrapped in burlap would look adorable on any present. Or draw a vase on a plainly wrapped present, and glue on flowers so they look like they are in the vase. Another idea is to use pressed flowers. Position dried, pressed flowers on top of the gift and use clear contact paper to secure them in place.
 All tied up
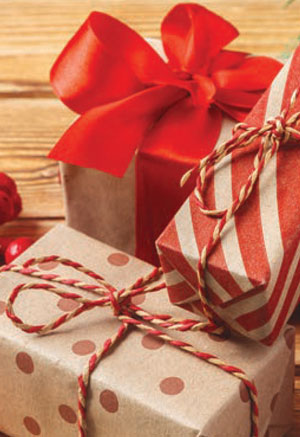
Ribbons and trim will add a finishing touch to your pile of presents. Instead of using a single ribbon, use three different ribbons in small, medium and wide widths. First tape the wide ribbon around the box, then add the medium and smaller widths on top of each other for a layered look. You can also create a basket weave pattern around your present with two different sizes of ribbon. Wrap individual pieces of ribbon around the box and tape together on the bottom. Next, tape a smaller sized ribbon perpendicular to that ribbon and wrap it around the box, alternating over and under the existing ribbon.
Tulle in any color is an elegant substitute for traditional ribbon, and yarn wrapped around the present in a rainbow pattern is sure to make anyone smile. There are numerous tutorials available to learn how to make your own bows. But don’t just add one bow. Make three or four bows in different sizes and attach them in order, smallest to largest.
Take it to the next level by also incorporating some of your gift on the outside of the box with the bow. Secure a sweet treat on your present, or tie on a bracelet, bookmark or bow tie.
Choosing a distinctive way to wrap your presents can be rewarding for this holiday season and beyond. It automatically makes wrapping seem more like an entertaining activity instead of a chore. Gift givers and recipients alike will be amazed by the creativity on display and may even spark a little competition among friends to see who can design and put together the most perfectly wrapped present! ✦
Beads, Burlap Fabric, Buttons, Embellishments, Feathers, flowers, Gift Wrap, greenery, Handkerchief, Jewels, Leftover Wallpaper, Maps, Pearls, Pompoms, Ribbons, Scarf, Sheet Music, Stamps, Stencils, tassels, trim, Vintage Newspapers


